
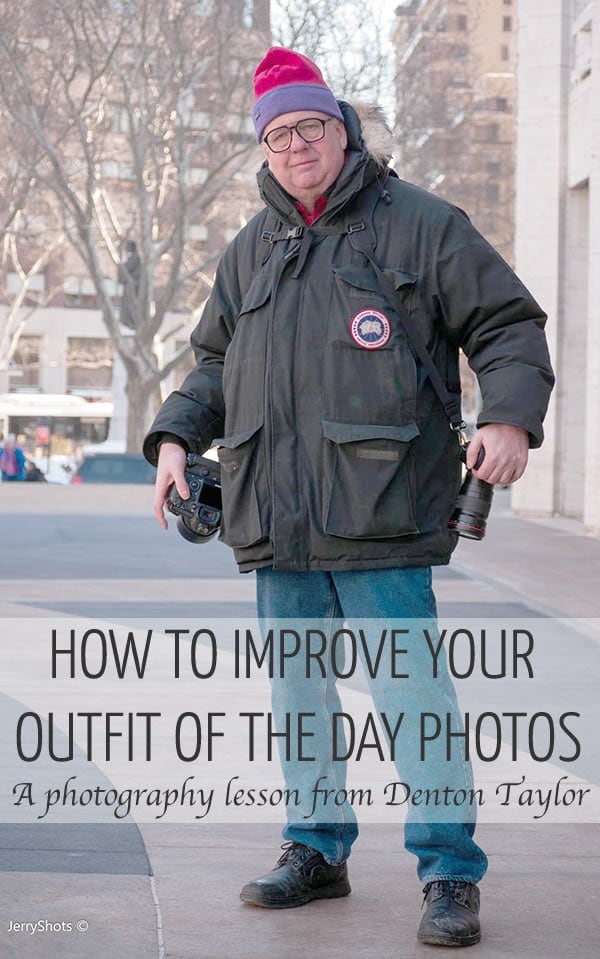
This is a guest article by Denton Taylor who takes most streetstyle photos for 40+Style.
Over the last months you have been able to admire the fabulous photographs Denton Taylor has been taking for this blog. You will find most of them here.
I asked him to share some of his photography tips, so we can all learn from him and take better pictures ourselves. So without further ado, here is Denton!
If you’re like me, you might visit several OOTD and fashion-related websites every day.
You may also have your own blog and post your own OOTD images. And every time you do, you have this vague sense of unease. You can see that your images are not as good as those on some of the large famous blogs, but you just can’t put your finger on why.
You might even have asked a friend who’s ‘into’ photography, and the first thing she did was laugh at your camera phone or small digicam and tell you to ‘get a real camera’.
This article will mostly not do that.
How to take the best images with the equipment that you have
It will teach you how to make the best images you can with the equipment you have (so you’ll have more money for the important things in life, like shoes).
There is absolutely NO reason why you cannot make well lit, properly exposed, professional looking OOTD images with something as simple as a camera phone (there, I said it, and like most photographers, I hate camera phones).
Of course this does not mean you will be able to make any type of image that you see in magazines or on the big blogs that are shot by pro photographers; for some things, equipment does matter.
But by understanding the limitations of your equipment, and working within them, you will still be able to turn out excellent photographs for your OOTD blog and your family photos.
Let’s very briefly discuss equipment, since everyone hates these discussions, right?
I will start by perhaps surprising you and stating that, all other things being equal, the primary determinant of image quality is the photographer; with the secondary determinant the size of the sensor used to capture the image, and the quality of the lens used to focus the image on the sensor.
While that sinks in, there are three types of tools we have to make images.
- The ubiquitous camera phone. Teeny tiny sensor. Teeny tiny lens. But, given good light, perfectly capable of putting quality OOTD images on the internet.
- Pocket digital cameras. Bigger sensor, in some cases much bigger. Better lens, in some cases much better. In general, you get what you pay for.
- Interchangeable lens cameras. For a long time, this meant Digital Single Lens Reflex (DSLR) cameras. We also now have another type known as mirrorless cameras, which are smaller in form factor. The biggest sensors of all, and, availability of high quality lenses (the so-called ‘kit’ zoom that came with your DSLR is only a medium quality lens as we shall see).
How you dress and pose yourself is entirely up to you.
Making a quality photograph of your dress and pose requires attention to the four following items:
- Quality and direction of light;
- Type of background;
- Achieving proper exposure;
- Achieving sharp focus.
1. Quality and direction of light
Do not, ever take photos in direct sunlight!
The light is harsh, unflattering, will be full of deep ugly shadows, and will make your clothes look terrible. Yes, they do it in Vogue, but the photographers use all kinds of diffusers and reflectors to soften the light. Do not shoot in direct sun!
Do not, ever take photos indoors!
There is hardly ever enough light. Smaller sensor cameras like phones will produce grainy and ugly photos. You may not have enough light and the camera shutter will stay open a long time, resulting in blurred photos.
Yes they do it in Vogue but there are actually all kinds of lights in those photos masquerading as no lights. Do not shoot inside!
Your choices to produce images with soft, beautiful light are simply, cloudy days; and what photographers refer to as open shade. Open shade is when you find a shady spot on a sunny day, for example, under a tree, on a porch, at the side of a building, etc.
The best kind of open shade occurs when you can pose in front of something where the light drops of behind; a deep porch, a tunnel, an overhang, etc.
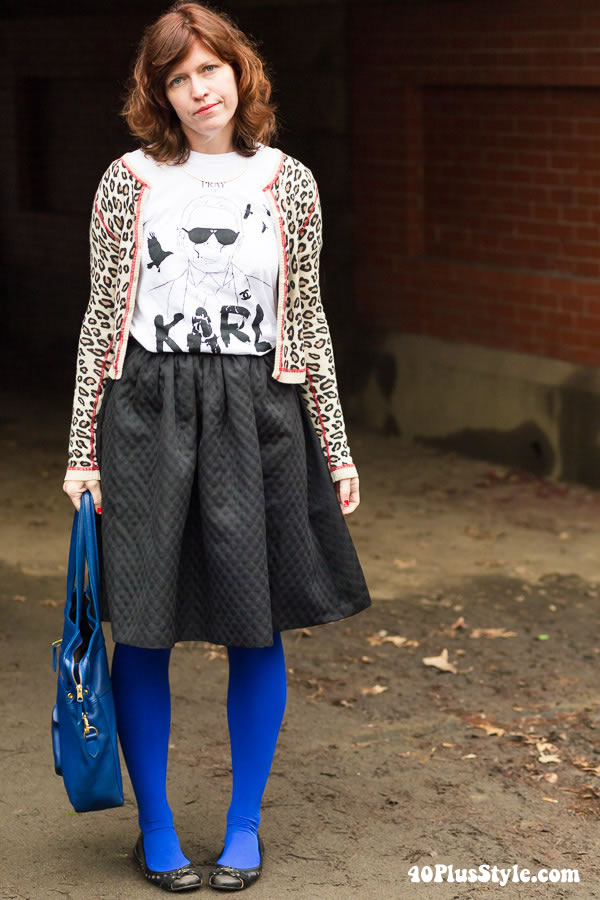
Consider, for example, this photo of my friend and fashion blogger Charity, with her Karl Lagerfeld tribute T-shirt.
Posed in New York’s Central Park, the light striking her is soft and beautiful. There is texture in her black skirt, and the light falls off into the tunnel, so that there is no distracting background (of which we speak later). This photo is completely achievable with a camera phone!
So, open shade or cloudy days! Just one thing to be careful of on cloudy days. Make sure the day is not too dark and cloudy, else the shutter may have to stay open too long which could blur the photo. Try and achieve a minimum shutter speed of at least 1/60th of a second.
2. Type of background
If you are lucky enough to have a DSLR and an appropriate lens (a 50mm 1.8, for example) you have more options available to you to alter the appearance of the background behind the subject (if you are not so lucky, don’t worry, just keep reading).
By putting your camera in ‘A’ (aperture priority mode) and adjusting the aperture, you can blur out the background to give a soft and appealing appearance. Consider the following two photos of the lovely fashion blogger Nisha.
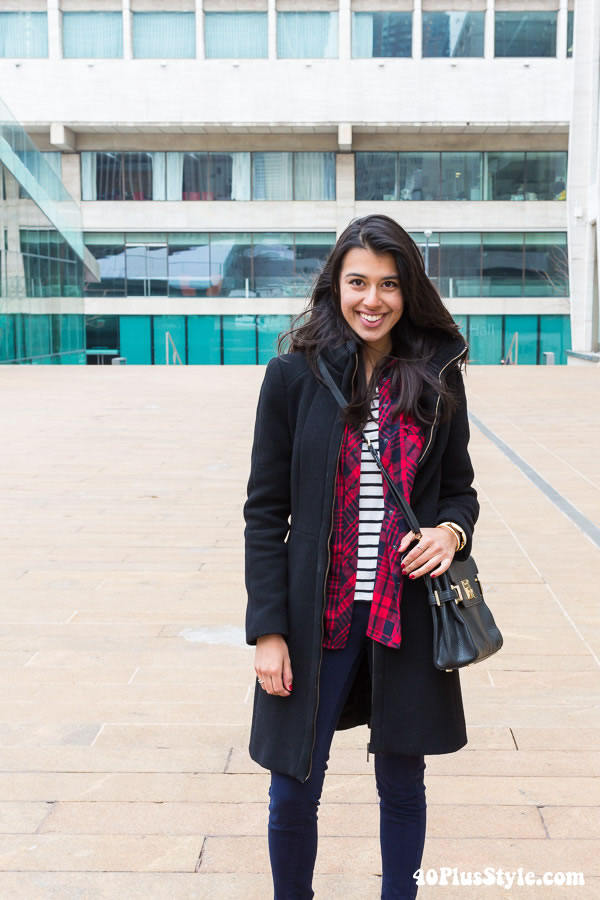
The first was taken at f/11. As you can see the background is in focus and distracting.
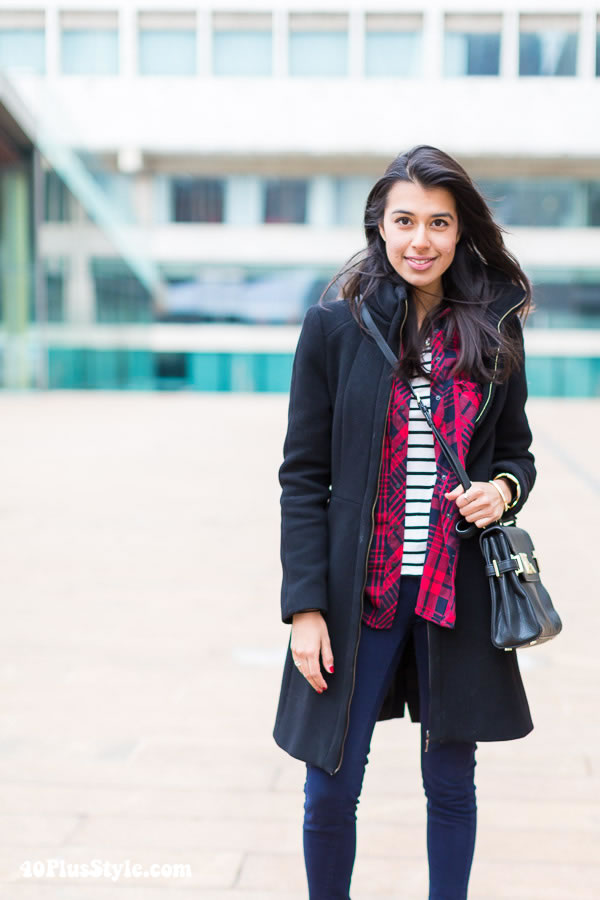
The second was taken at f1.8. The background still gives a sense of place, but it is blurred out and does not compete with the subject.
What you could buy
This will be the only time in the whole article I will suggest you buy something. If you have a DSLR and you are doing this type of photography, may I suggest you put the kit lens aside and get yourself a 50mm f/1.8 lens.
Canon and Nikon both sell them new for a bit over $100, and you can get them for less on the used market. That lens will be much sharper optically than the kit zoom , and will allow you to shoot at f/1.8 to throw the background out of focus as I did here.
Shooting with a camera phone? You will not be able to throw a background out of focus. But all is not lost. All you need to do is to find a plain background! It could be the side of your house, another blank wall, or anything that keeps the eye on you.
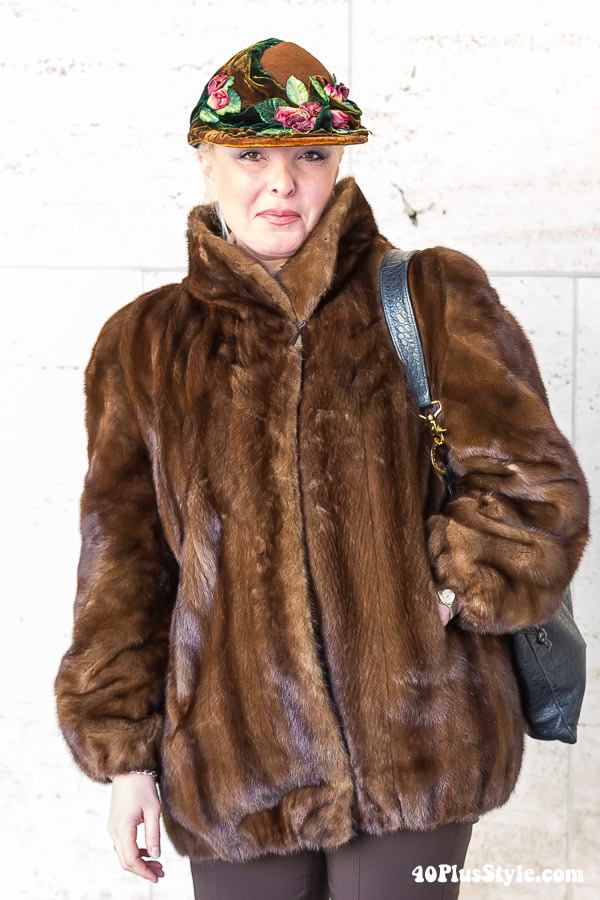
Consider this photo of a woman in an interesting hat, taken at Fashion Week. It is taken in open shade, right smack up against a wall. I could have done this just as well with a camera phone.
OK, sometimes rules are meant to be broken! Once in a while, I’ll take a blogger to an interesting background if it tells a story. Here, my friend Nisha and I decided to do a Fashion Week post.
I decided to place her in the middle of the chaos, so it would look exciting and interesting. Here’s a complicated background that tells a story! (Note that we haven’t forgotten that nice soft light!)
3. Achieving proper exposure
The majority of OOTD shots taken by bloggers are under-exposed. The first reason is that Caucasian skin will automatically be a stop under-exposed when read by a typical camera meter (the reasons are beyond the scope of this article but if you’d like to find out more do a search on ‘Ansel Adams Zone System’).
Also you must make sure that there is detail in dark things like leather and black clothes. This will often require an exposure boost when you open the photo on your computer, or, you can adjust the exposure compensation on your camera to +1 stop.
Generally, some over-exposure will be more pleasing and natural than under-exposure.
4. Achieving proper focus
Generally, the point of focus should be on the eyes. If it’s not right, do it again. There is no reason to post out-of-focus shots!
Summary
Proper exposure and focus are the simple technical details to get right. Add soft pleasing light and a simple background and you’ll be a happy blogger!
Feel free to ask questions here on 40+ Style, or email me directl at [email protected]. I’ll try and help in any way I can.
Note from Sylvia: Thanks for an excellent article Denton!
Please note that I use the 50mm lens that Denton recommends and it is excellent. It’s very light too so that your camera will not weigh a ton. I’m personally using a Canon Rebel t3i (6500 D) which is an affordable all purpose DSLR camera.
Although you can’t achieve a blurry background with an iphone, I recently discovered the app Tadaa, that makes it very easy to blur the background. You may want to give that a go.
You can view Denton Taylor’s portfolio online.

All photographs by Denton Taylor
Want to get more articles from 40+style in your inbox, subscribe here.
You can also connect with 40+style on Facebook, Instagram or Pinterest.
Support 40+style by using the links in our articles to shop. As an associate for Amazon and many other brands, we receive a small commission (at no cost to you) on qualifying purchases which enables us to keep creating amazing free content for you. Thanks!
As someone who takes all her photos exclusively using an iPhone (my husband says until my blog generates substantial income, that’s as good as it gets), I feel completely encouraged and validated by this post. Somehow, through experimentation and I guess a “good eye”, I figured out the trick to photographing in front of a blank canvas (i.e. the side of my house) which happens to be in the shade all the time. Boring? Sure. But this way, the focus is always on the clothes.
Thank you, also, for the Tadaa app. Wish I’d read this article sooner; I’d already purchased a similar app, but since this one’s free, I’ll check it out too.
This was a terrific post. Just what I need. I have a good Samsung camera, I think a DSLR. And I am learning all about it, just very slowly (….).
I did not understand what you say in paragraph number 3 about the exposure. I will have to go to the camera shop and ask where the +1 button is hiding.
And I get what you say about trying to always photograph when it is cloudy or when you have a dark background and such. But having a more than fulltime job + chores in and around the house, gives me limited time to do the photowork. Also the weather is often a spoil sport. I guess I just have to put in more time and effort and look for glass shopping mals or something.
Greetje
I think I’ve told you before but one of the best things you can do is invest in Lightroom and take all your photos in RAW. That way you can move up the exposure in Lightroom. Almost ALL my photos get a bit of adjustment there. And when you shoot in RAW you get a lot of control over your images and it would look (almost) the same as when you got the exposure right in the first place. It would make a huge difference to many of your darker images.
Greetje, it’s called the ‘exposure compensation’ control. Some cameras have a dial for it, others you have to go into the menu.
Don’t forget I not only mentioned cloudy but also ‘open shade’. If you can find a place that’s _always_ in the shade, sunny or not, that could be your place. I shoot regularly for some OOTD bloggers and I make sure to have several places i can go to even when it’s sunny.
Naturally Sylvia is correct about Lightroom and shooting in RAW. Of course what happens _after_ you take the photo is very important (we call it post-processing) and could be the subject of a verrrry long article. Lightroom is really a game changing program, not only does it help edit your photos, it allows you to easily categorize all your years of photos.
Anyone interested in Lightroom and Photoshop might be interested in knowing that Adobe has a ‘photographer’s package’ whereby you can get both for $9.99/month USD total. Not sure if it’s the same all over the world or not.
http://www.adobe.com/products/creativecloud/photography.html
Thanks Denton. I would like to add though that it is not necessary to get Photoshop. You can do almost everything in Lightroom and it is much easier to use than Photoshop. I would say to only move to Photoshop when you outgrow Lightroom, in terms of very advanced editing.
Thank you both a lot. I have no “bothered” with Lightroom because I wanted to take a break from learning yet another thing. I am very lazy.
So far I used PicMonkey. But I will change that to Lightroom. And when I inspected my camera I saw that I have about 4 RAW options. Have to find out which one to use. So far I did not shoot in RAW which means (so Sylvia taught me) less oppportunities to improve your shots.
Thank you, Sylvia and Denton.
I am currently working on the blurred background issue. Hope eventually we will get my photos there…
You are so right about too much sunshine. It always makes me look like a ghost 😉
Annette
Spectacular lessons! I have enjoyed a lot this post!
kisses for you and your photographer!
Very timely, Sylvia. I had to teach myself Photoshop the other morning in order to remove a telephone cable that went through my head! My photographer (aka my husband) said he knew it was there….so why didn’t he ask me to move! You can’t teach common sense!
Really interesting. I have a small Nikon pocket digital camera. Can I adjust the shutter speed? How do I know it is 1/16 sec?
I am doing product photography rather than people, but the same rules seem to apply, outside in shade with a contrasting background.
Thanks for this clear and simple guide.
Kate, if there is a dial on your camera that we call PASM (Program, Aperture control, Shutter control, Manual) you can adjust the settings. But even if you can’t, just look at the photo after you shot it. Even the most rudimentary cameras should display the aperture, shutter speed, and ISO of the photo after you have taken it. (We generally want to see a shutter speed of 1/60th or faster, not 1/16). If the shutter speed is too slow, try and find better light, or possibly increase the ISO if it is not already too high. (and what is too high will depend on the age and type of camera).
Oh and yes, lighting is everything for product photography too. Look for nice soft even lighting.
Thanks for the great tips, and it’s nice to see the fella who appreciates a great shoe! I have a Canon Powershot SX20IS and I have been disappointed with in for anything other than outdoors on a sunny day. I should have gone for the DSLR when I finally bit the digital camera bullet, but had not done much photography in a while and wasn’t sure how much I’d use it. Maybe one day I’ll splurge. I don’t photograph people (if I can help it) but I love scenery and take a lot of photographs of the animals I work with at the humane society where I volunteer, so I’m sure these tips will come in handy there as well. 🙂
Yes Rita taking dog shots is not much different from people shots. Get good lighting (outside) and make sure you focus on the eyes. Since dogs don’t wear clothes (lol) it’s more about the character of the animal than the whole body, generally speaking.
I have some pet portraits on my website as an example…
http://dentontaylor.com/pets/
Thanks, Denton! Your pet portraits are gorgeous. I work a lot with cats, too, and because they don’t typically “stay” and are often wiggly, they are a different kind of challenge. I get a lot of blurry, half-cat shots or paws swatting at the lens…hehe. The advantage of digital is that you can take LOTS of photos and maybe one or two will come out. 🙂
Thanks for the very useful information both of you good work!
Wow, Denton, I love your casual tone and the plethora of information packed in this easy to read and understand format. Images are stunning!
Thanks so much for these tips Denton!
I’m in the market for a better lens that what came with my camera. Now I know which one to get.
I’m bookmarking this page for future reference.
bisous
Suzanne
yes the 50mm is good, light and cheap. It’s definitely my favorite lens! Thanks for uploading your picture Suzanne!
“— more money for the important things in life, like shoes” – wow Denton, you really understand women. 🙂
It is very nice to “meet” the man who has shared so many great photographs on this site. Thank you for an informative post on how you get those great shots. I have especially enjoyed the photos you took at New York Fashion Week. I wish you continued success.
Many more to come Suzanne 🙂
Great tips – thanks for sharing this, Sylvia. I am working on a nice soft neutral background for my shots.
You probably already have one. If you don’t have a nice neutral outside wall, you can use a sheet, a blanket, or things like that you most likely have at home.